Separating donations into different categories
Back to: Collect and Display Donations on Your Website
License Note
For this lesson you’ll need a GravityKit Core + Extensions or a GravityKit All Access License.
If you would like to run multiple campaigns using the same donation form, you can easily do so with the Advanced Filtering extension for GravityView.
In order to filter donations by campaign, you’ll need to add a field to the form that indicates which campaign the donation is for. Let’s add a Radio Buttons field for this purpose.
Set up the radio button field with each of your campaigns available as a choice in the field. You can allow visitors to choose which campaign their donation goes toward when they fill out the form by keeping the field visible.
If you would rather that the campaign is selected behind the scenes, you can set the field to hidden and allow it to be populated dynamically. Then, you’ll be able to create a separate link for each campaign that will all lead to the same form, but will populate this field depending on which link the donor has clicked.
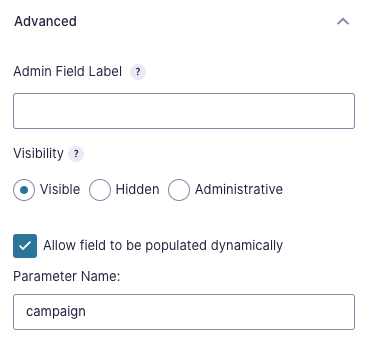
To set up the dynamic population, go to the “Advanced” tab in the form editor. There you’ll see a checkbox labeled “Allow field to be populated dynamically”. Once checked, a new box will appear requesting a parameter name. Type your chosen parameter name in the box (for this example, we’ll use “campaign”).
Now you can populate this field dynamically, by adding the parameter to your page URL, like so:
https://www.yoursite.com/donation-form/?campaign=Campaign%201The first part of the URL (in blue) is the page where your form is located.
The second part of the URL (in red) is the query string that prefills the field. After the “/” at the end of the page URL, add a question mark, followed by the parameter name (campaign), followed by an equals sign.
After the equals sign, enter the option that you want preselected. Note that this information is case sensitive (i.e., if it is capitalized on the form, it needs to be capitalized in the URL, too!). Also note that you’ll need to use %20 in place of any spaces since URLs cannot contain spaces.
In my example above, the option that I’m preselecting on my form is “Campaign 1”. I’ve capitalized the word “Campaign” to match how it appears on my form, and I’ve replaced the space between “Campaign” and “1” with a “%20”.
Once this field is set up on your form, you can filter your View based on which campaign is selected.
Inside the View editor, scroll down to the Settings box and click on the “Filter & Sort” tab.
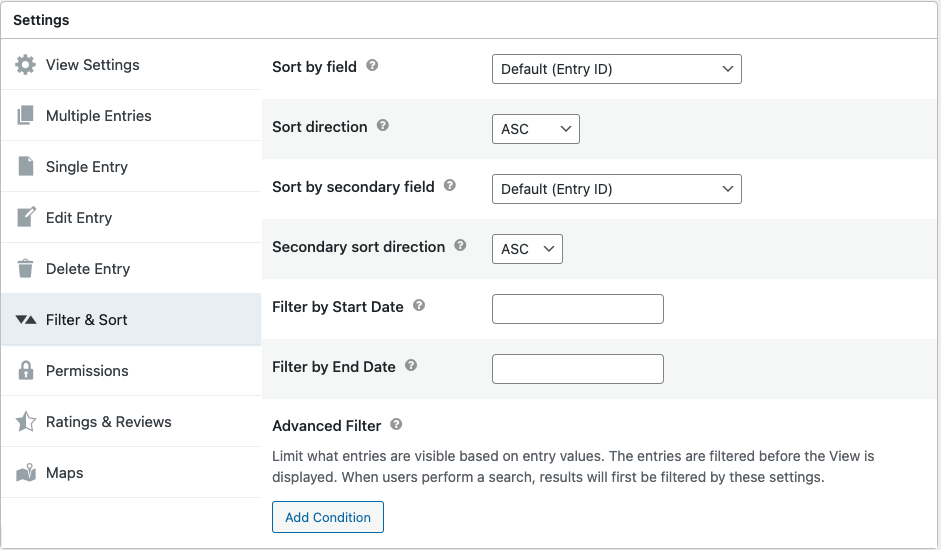
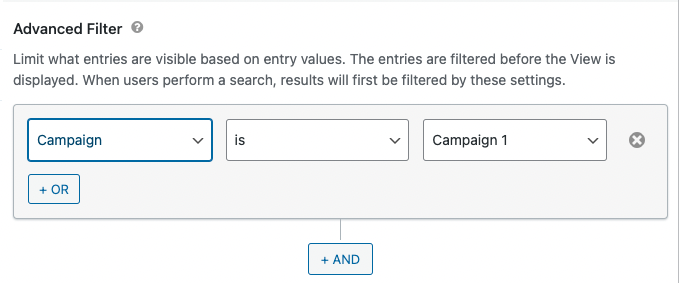
Now click the “Add Condition” button under “Advanced Filter”, choose your campaign field and select the first campaign.
You can duplicate the View and change this filter for each of your campaigns, and then display them separately on your site.
💡 Pro tip
For more information about the Advanced Filtering extension, see our course on Using Advanced Filters to Easily Display Subsets of Your View.