Merge Tags, Notifications, and Confirmations
Back to: Exploring the Image Hopper Plugin
In this lesson you learn how to use Image Hopper’s merge tags (learn more about Gravity Forms merge tags) to display images in Notifications and Confirmations, or anywhere else they are supported. Merge tags are useful if you want to display user-submitted values (such as image URL, title, caption, etc.) if needed.
Image Hopper merge tags can be used in two different ways:
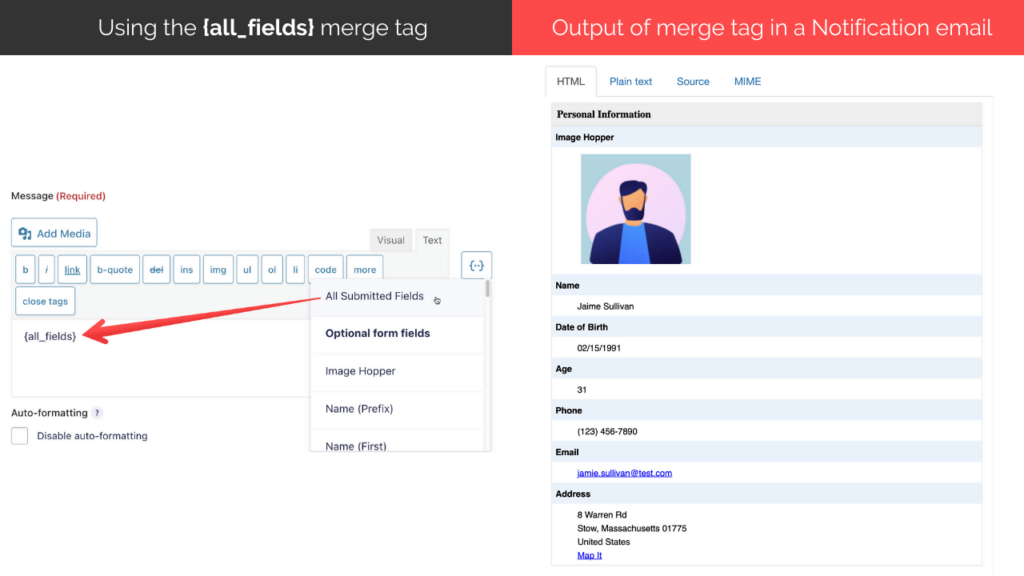
1. The Gravity Forms {all_fields} merge tag which displays all the field values submitted in the form.
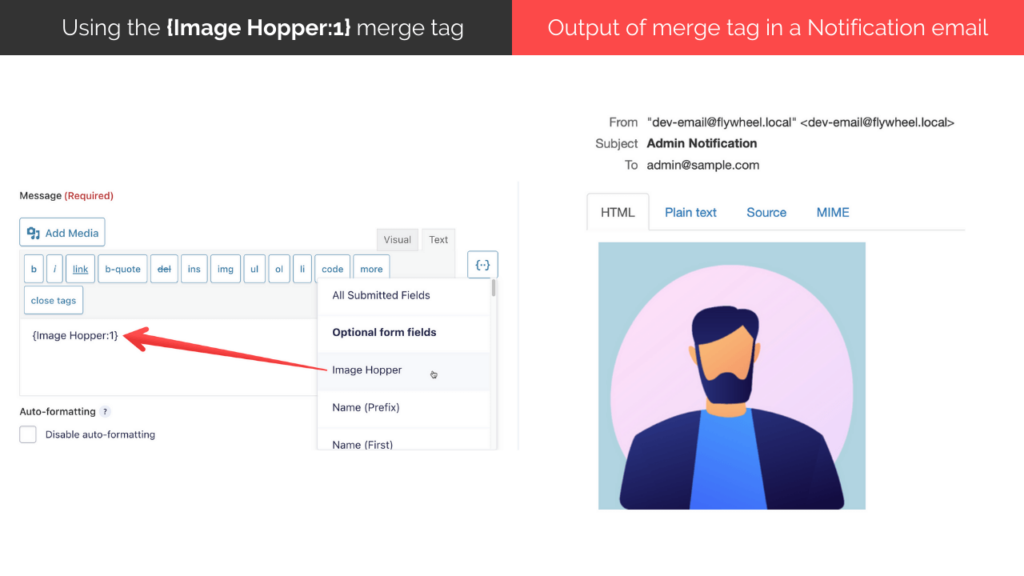
2. A separate Image Hopper field tag if you only want to display specific field values in the form.
Modifiers
When using an Image Hopper field tag, you can include modifiers to dictate what the output of the submitted image will look like.
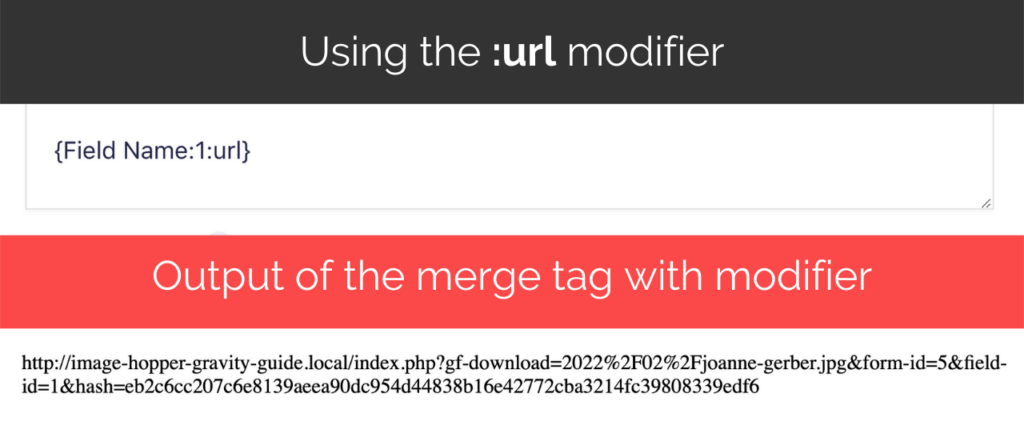
:url – indicates that the submitted image will be shown in plain-text secure/masked URL(s). Multiple images displayed in text context are separated by a comma (,)
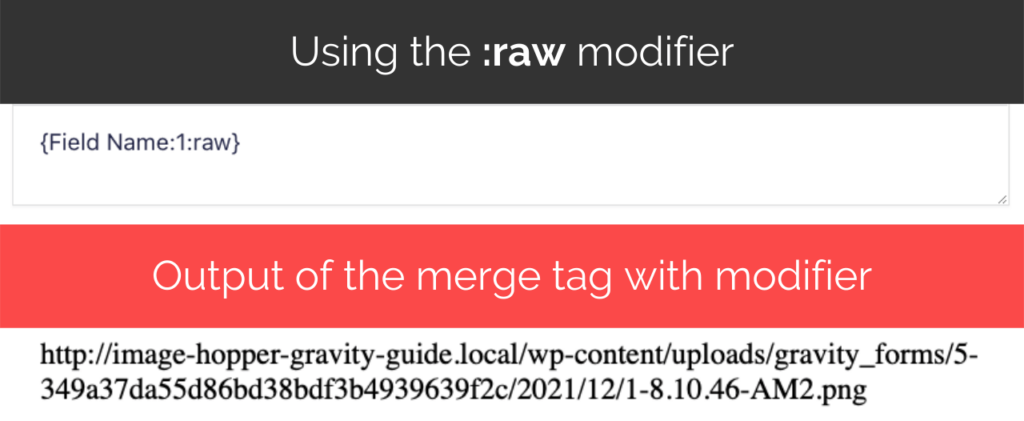
:raw – indicates that the submitted image will be shown in plain-text direct URL(s). Multiple images displayed in text context are separated by a comma (,)
Now let’s see how these merge tags can be integrated into your Gravity Forms Notifications and Confirmations.
Notifications
Go to the Form’s Settings and select Notifications. You can choose to either create a Notification email by selecting Add a New Notification or Edit an existing one.
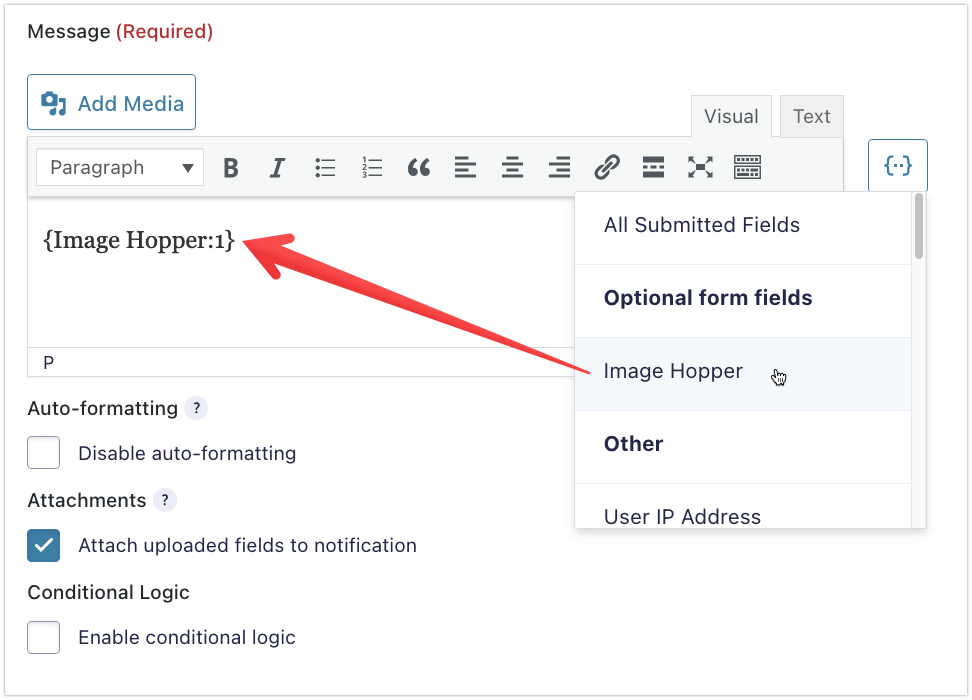
Scroll down to the message box and click on the merge tag selector located at the top right corner. From the dropdown list, click either the All Submitted Fields or Image Hopper merge tag depending on your use case.
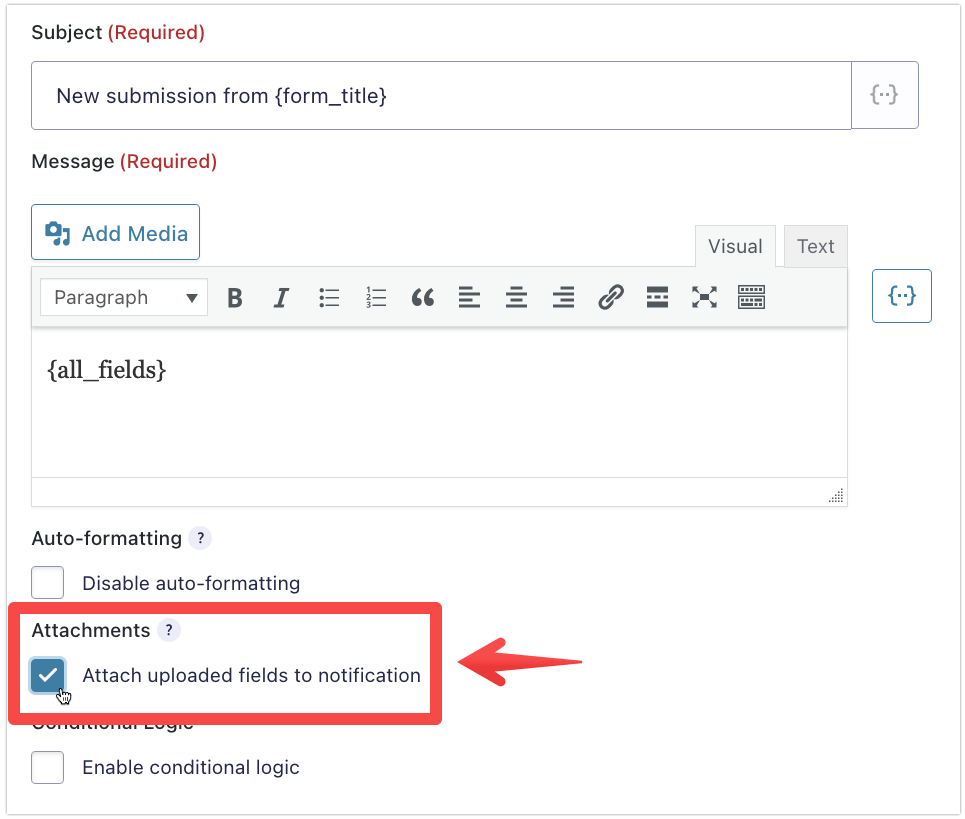
You can also include images as attachments. To do this, enable the Attach uploaded fields to notification settings located just below the message box. This will automatically attach all images uploaded via the Image Hopper field.
Click Update Notification to save.
Confirmations
The usage of Image Hopper merge tags in Gravity Forms Confirmations is similar to that of the Notifications except for the Attach functionality.
Go to the Form’s Settings and select Confirmations. You can choose to either create a new confirmation by selecting Add a New Confirmation or Edit an existing one. Make sure to click Update Confirmation to save.
Run a test to check if the uploaded image/s is now displayed on the Confirmation page after submitting the form.
Post Image Merge Tags
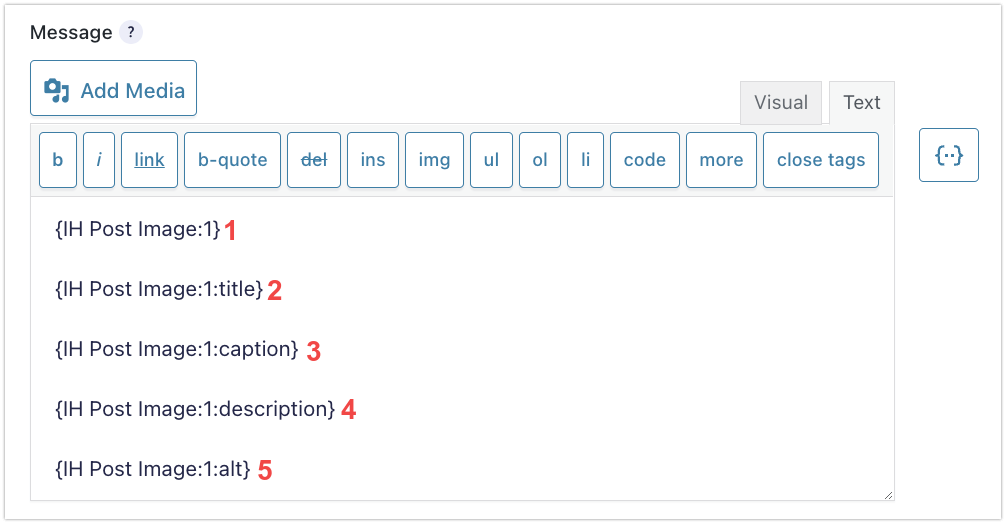
The IH Post Image field has the same merge tags as Gravity Forms Post Image field. These can also be used in Notifications and Confirmations. These merge tags include:
- {IH Post Image:[ID]} – Displays the full URL to the image
- {IH Post Image:[ID]:title} – Displays the image metadata Title
- {IH Post Image:[ID]:caption} – Displays the image metadata Caption
- {IH Post Image:[ID]:description} – Displays the image metadata Description
- {IH Post Image:[ID]:alt} – Display the image metadata Alt
Here’s an example output of Post Image merge tags when used in a Notification email:
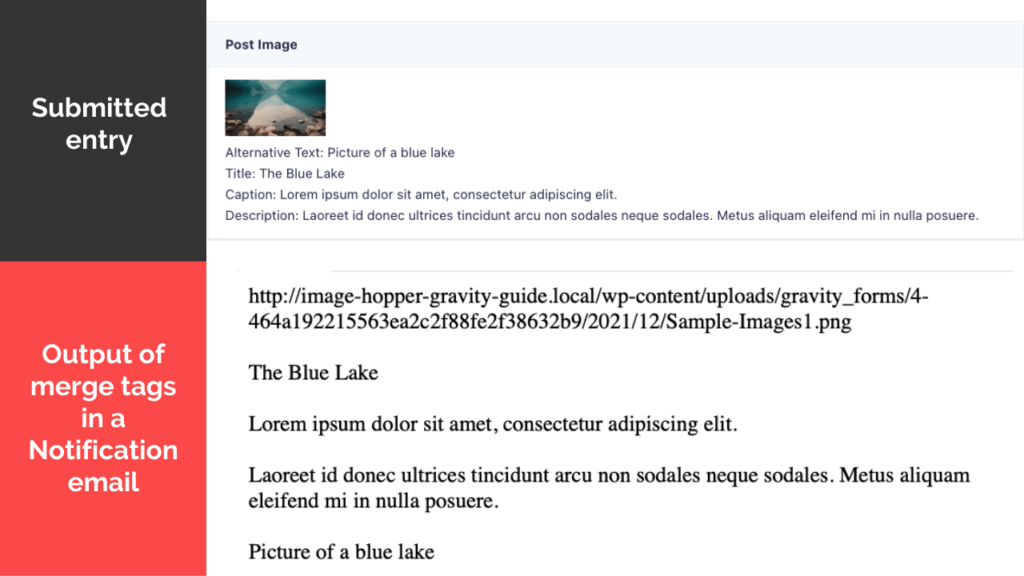
If you want to display the actual post image in the Notification email, simply wrap the {Post Image:1} in an IMG tag.
Here’s an example of how it should be written together with the output in the Notification email:

This wraps up all the available features and settings found in the Core plugin. In the next section, we will tackle the Editor plugin which revolves mainly on the different Image Hopper editing tools and features. Mark this lesson complete if you’re ready to proceed.