Map View
Back to: Map View
Licensing Note
Map View is available with a GravityView All Access License.
To create a Map View, you’ll need to install the Map Premium View extension.
First, find Extensions under the Views menu in the Admin sidebar.

Then, find the Maps Premium View extension.
Click Install, then Activate.
Note
In order to use Map View, you’ll need to set up a Google Maps API Key.
Go to Settings in the View menu and scroll to the bottom. Follow the instructions in the link that says “How to get a Google Maps API Key”

Now you have three options to create a Map View.
Add a Map to a Listing View
We’ll start with adding a map to the top of our existing Listing View.
To do this, go to the Edit View screen of the Listing View.
In the Above Entry Widgets, add Multiple Entries Map.
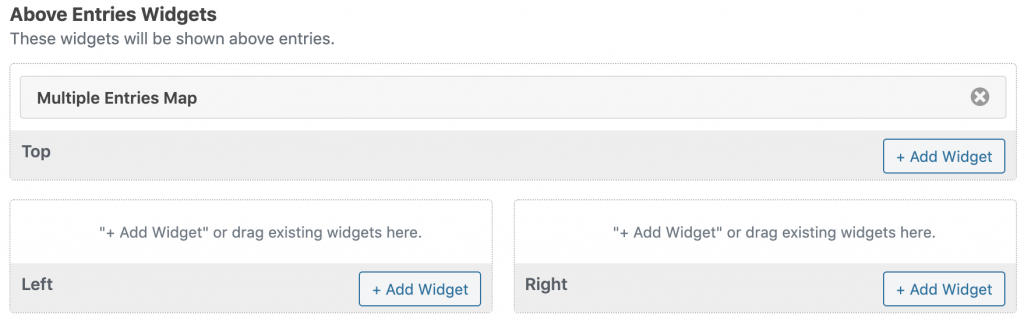
You’ll notice there is no gear icon on this field. To select your settings, scroll down to View Settings at the bottom and choose the Maps tab.
Select one or more address fields to show on the map.
You can choose from a number of pin icons, or upload your own.
There are a number of additional settings here you can play with.
A zoom level of 2 will generally show the entire world map on your screen. A zoom level of 16 zooms in to the street level. This is what it looks like at a zoom level of 4 with the first entry captured below it.

Create a Map View
Another option for Map View is to create a separate View using the Map View View Type. The layout of the entries is different from the Listing View layout. Here is a look at it with just the basic information displayed.

The Single Entry layout for this style is similar to the Listing View Single Entry layout:

Create a Standalone Map
There is also the option to display only the map by using a little CSS. Info boxes would really come in handy in this case.
