Image Cropping
Back to: Exploring the Image Hopper Plugin
0
The Crop feature is the bread and butter of any image editing application as it helps users to improve the composition of photo/s they’ve uploaded. It is also the first tool that usually comes to mind when editing an image. In this lesson you will learn how the Image Hopper Editor implements image cropping. Select the Crop tab from the Primary Toolbar to get started.
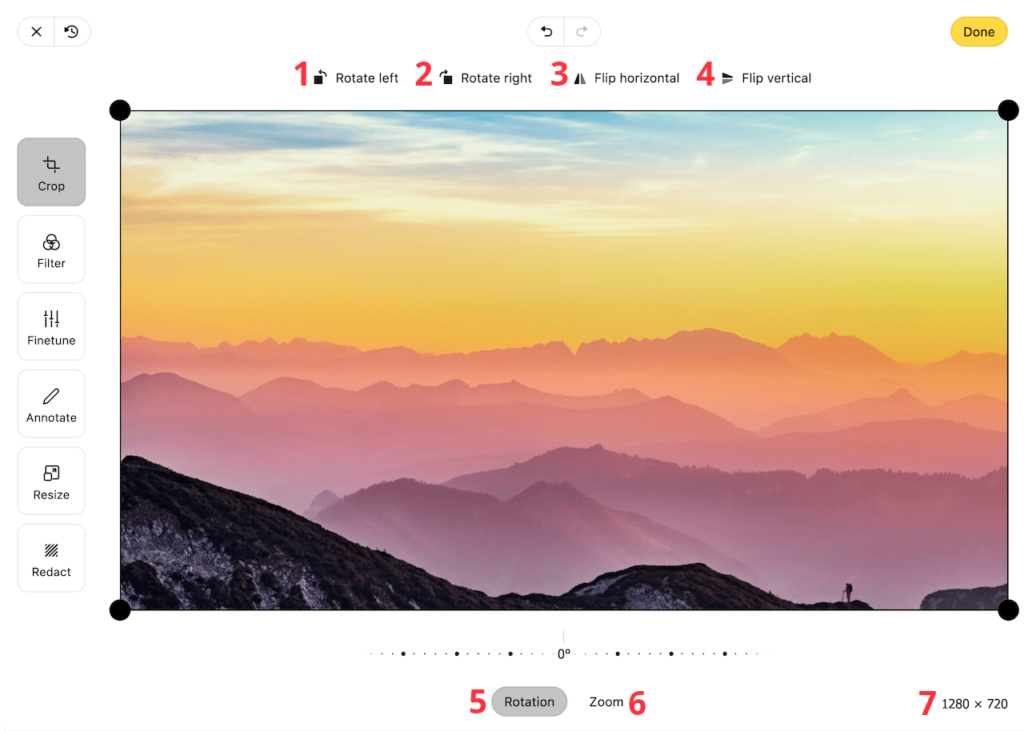
There are a variety of tools are available in the Crop tab, including:
- Rotate Left – rotates the image 90 degrees counterclockwise
- Rotate Right – rotates the image 90 degrees counterclockwise
- Flip Horizontal – flips the image 180 degrees on the X axis
- Flip Vertical – flips the image 180 degrees on the Y axis
- Manual Rotation – drag the slider to manually rotate the image left/right up to 45 degrees.
- Zoom – drag the slider to manually zoom in or out the cropped area of the image. You can also use your mouse scroll wheel, or pinch zoom on your trackpad.
- Display Size – shows the current size the image cropped image
NOTICE
If you’ve set a Minimum Image Size, it is not possible to crop below your specified dimension. Attempting to do so will restrain the cropping box from going below the minimum requirement.