Displaying donations on the front end
Back to: Collect and Display Donations on Your Website
License Note
For this lesson you’ll need a GravityKit Core + Extensions or a GravityKit All Access License.
Create a new View, name your View and select your data source by choosing your donation form from the drop down menu.
Choose your View Type. I’m using the “List” View to allow space for the donation message. If you want to only display the name and donation amount, you could choose either the “Table” or “DataTables Table” View Types.
Once you’ve selected your View Type, the View editor will appear. Remove the widgets in the “Top Widgets” section and scroll down to the “Entries Fields” section.

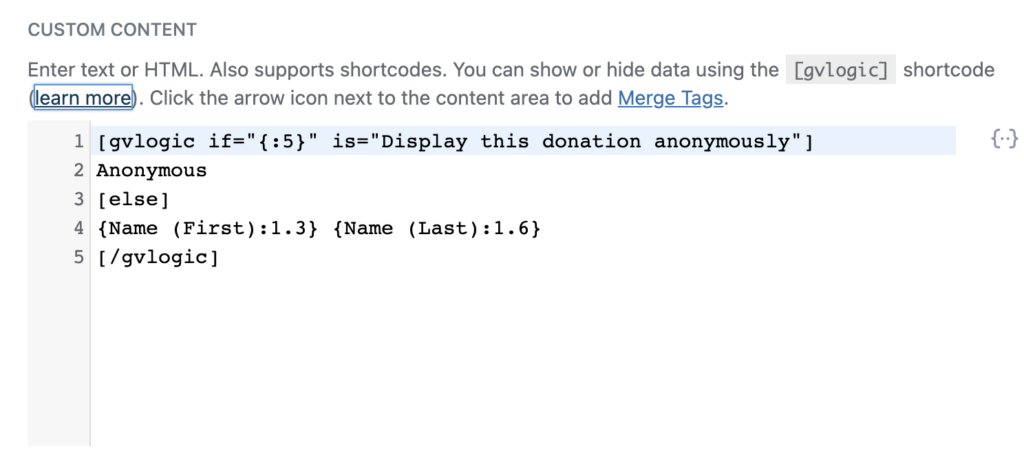
Start by adding a “Custom Content” field to the “Listing Title” block. We’ll be using the [gvlogic] shortcode to determine whether to display the name of the donor or simply the word “Anonymous”.
Click the gear icon next to the Custom Content field label and enter the following shortcode in the box (make sure to replace the merge tags with your own!):
[gvlogic if="{:5}" is="Display this donation anonymously"]
Anonymous
[else]
{Name (First):1.3} {Name (Last):1.6}
[/gvlogic]
The checkbox field allowing users to choose to submit their donation anonymously has no Field Label on the form, so the merge tag just includes the form ID: {:5}.
In the “Other Fields” section, add the other information you would like to display. I’m displaying the Payment Date, Total, and Donation Message.
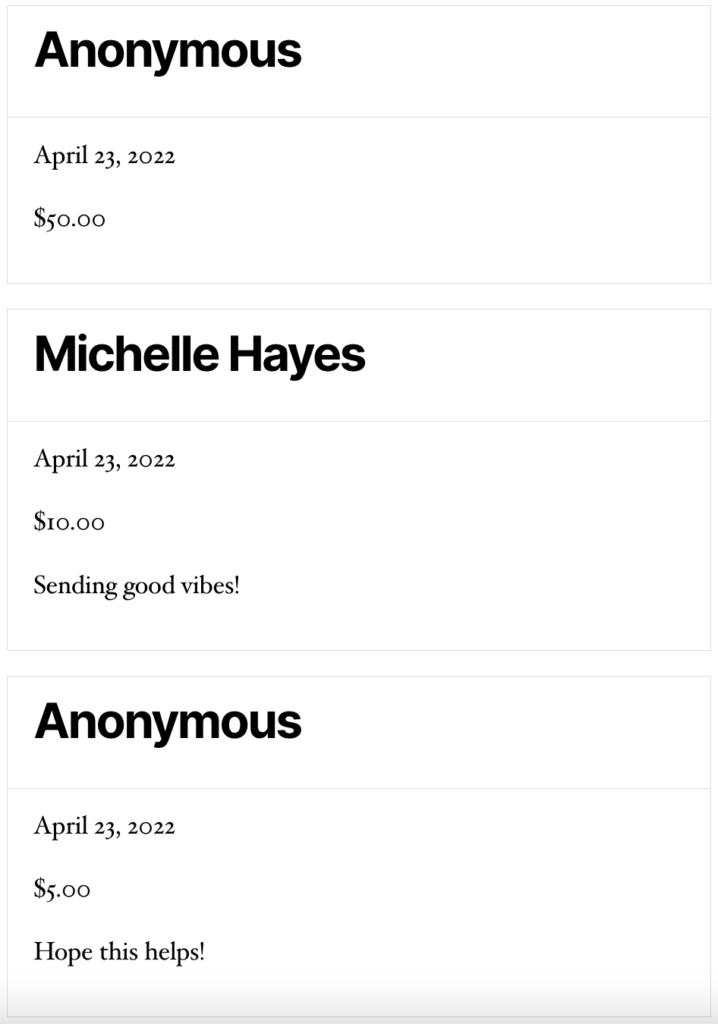
Here’s what our View looks like on the front end. (Yours may look different depending on which theme you’re using).