Creating the View (Single Entry Layout)
Back to: Getting Started with GravityView
You may remember in the previous section we added a link to the Single Entry page from the Multiple Entries layout. In this part of the course, we’re going to configure the Single Entry page.
What Is the Single Entry Layout?
The Single Entry Layout allows you to display more information about a specific entry.
Adding Fields to the Single Entry Layout
First, click on the Single Entry Layout tab at the top of the View editor.

From within the View editor, the Single Entry Layout looks the same as the Multiple Entries Layout, except it does not contain any widget areas. We’re going to replicate the layout we created for the Multiple Entries page while adding a couple of extra fields.
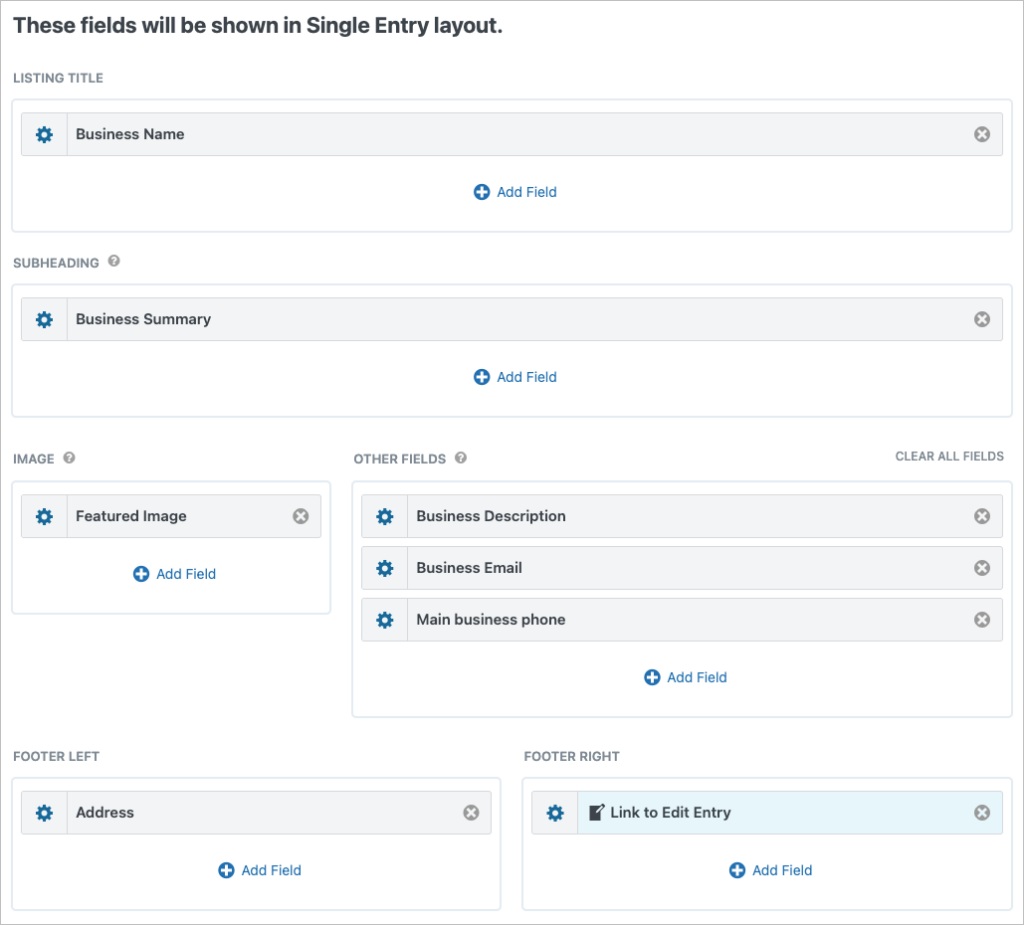
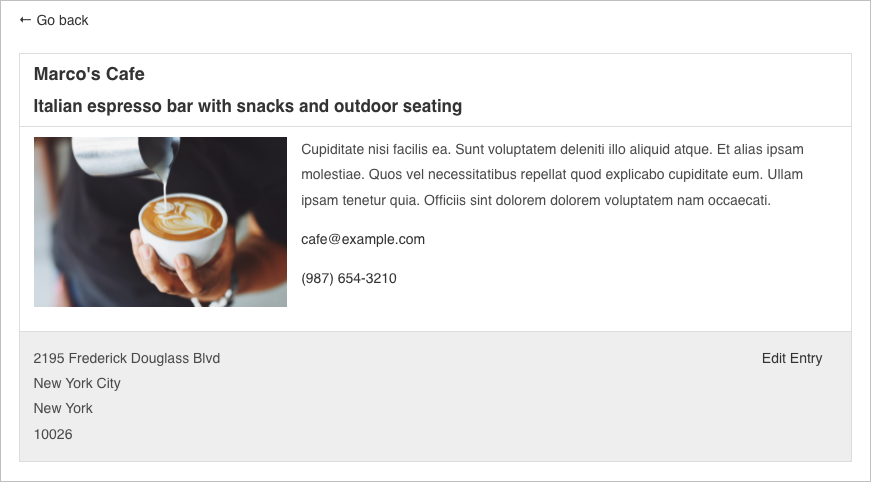
Start by adding the “Business Name” field to the Listing Title section and the “Business Summary” field to the Subheading section. Next, add the “Featured Image” field to the Image section.
In the Other Fields section, we’re going to add three fields – the “Business Description”, “Business Email” and “Main Business Phone”.
Finally, in the footer, we’ll add the business address and a link to the Edit Entry page.
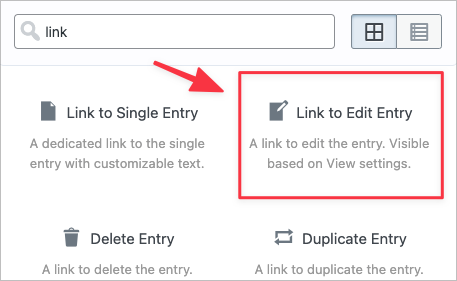
Adding a Link to the Edit Entry
To add a link to the Edit Entry page, click on the ‘+ Add Field’ button and select “Link to Edit Entry” field.
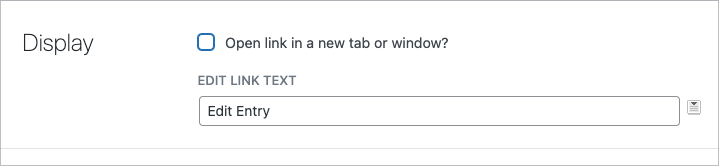
To alter the field settings, click on the gear icon. Here, you can change the link text, force the link to open in a new window and more.
Here’s what the Single Entry Layout looks like after adding all the relevant fields:
Configuring the Email Settings
When you add an Email field to GravityView, there are several optional settings to configure. To see these options, click on the gear icon.
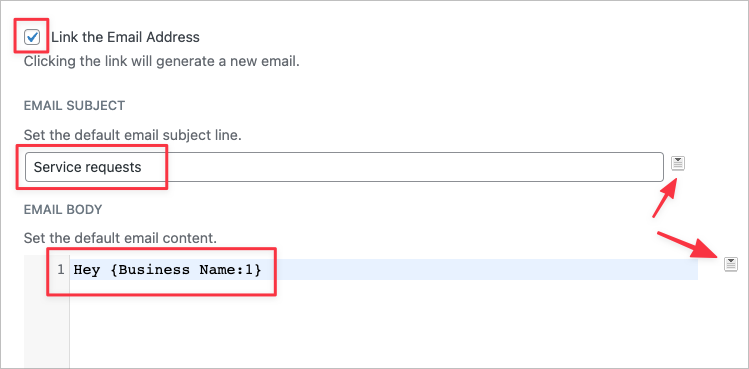
By checking the box that says “Link the Email Address”, the email address becomes a clickable link that will open in an email client. You can also add a pre-written email subject and body.
In the email subject and body, you can use merge tags to display information captured via your form. Here’s an example:
Hey {Business Name:1}If the business name was “Marco’s Cafe”, the email body would read “Hey Marco’s Cafe”.
To add a merge tag, simply click on the button to the right of the input field.
Previewing the Single Entry Layout on the Front End
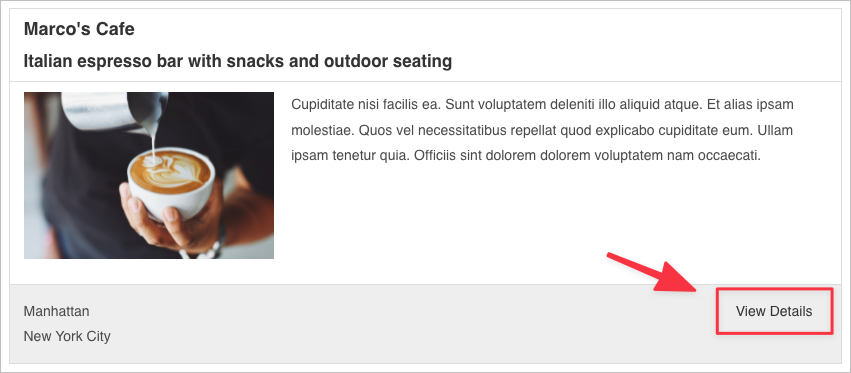
When you’re done, publish your View and open it on the front end. Now scroll down to one of the listings and click the “View Details” link.
This will take you through to the Single Entry page.
That’s it!
Conclusion
In this lesson, we configured the Single Entry Layout. In the next section, we’ll finish constructing our View by configuring the Edit Entry Layout.
See you in the next lesson 👋
Additional Resources:
- Changing the Single Entry view title
- Field Merge Tags (Gravity Forms Documentation)