Create Forms Without Login
Back to: Host a Virtual 5K with Gravity Forms
License Note
This lesson requires a Gravity Forms Basic License and a Gravity Perks Advanced License.
In this lesson we will build a registration form without creating a new user on your site. The results entry form will check a unique identifier and the submitter’s last name against the list of known registrants to allow for submission of race results.
Registration Form
Build your form to collect the details that you need. Some common fields to consider:
- Name
- Address (if you are mailing out a race packet)
- Birthdate (to calculate age on race date)
- Gender (to display race results)
- T-shirt Size (if included)
- Consent
- Payment Field
Once your fields are set up, edit the Confirmations in Settings to include what registrants should anticipate. When will their race packet arrive? Will you send them an email with details?
Next you’ll probably want to set up an email. You can do that through the form Notifications, or you can send an email from your email marketing platform. If you choose the latter, set up the appropriate Gravity Forms Add-On and configure the appropriate feed in your form Settings.
To confirm the runner’s identity without a login, you’ll want a unique ID to keep track of them. This can be a bib number or just a runner ID that gets sent by email. This will help to ensure that when runners report their times, they aren’t mistakenly (or maliciously) reporting a time for someone else.
For this you’ll need Gravity Perks’ Unique ID.
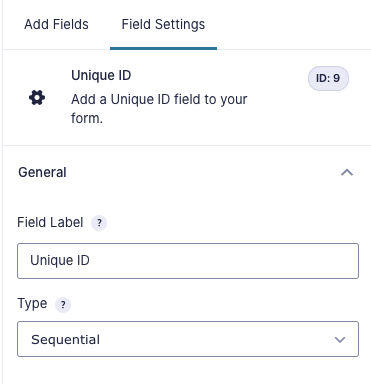
Start by adding a Unique ID field to your form. Select Sequential in the Type dropdown box.
Next, go to the Advanced tab and set your starting number and the length of your number.
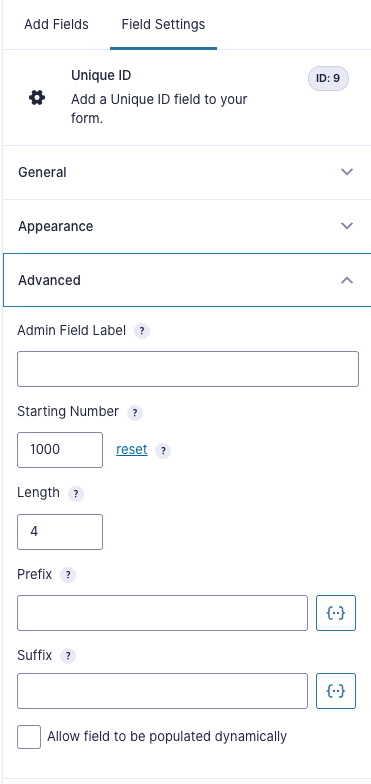
By setting a starting number of 1000 and a length of 4 as I have, the numbers assigned will start with 1000 and continue sequentially (1001, 1002, 1003, etc.) until 9999. You can include this number in the confirmation email to the runners and also print this out on the bibs. (Adjust the settings as you see fit to meet your needs.)
Results Entry Form
Runners will access this form by entering their Bib Number and their Last Name. When those fields match they will be able to enter their results.
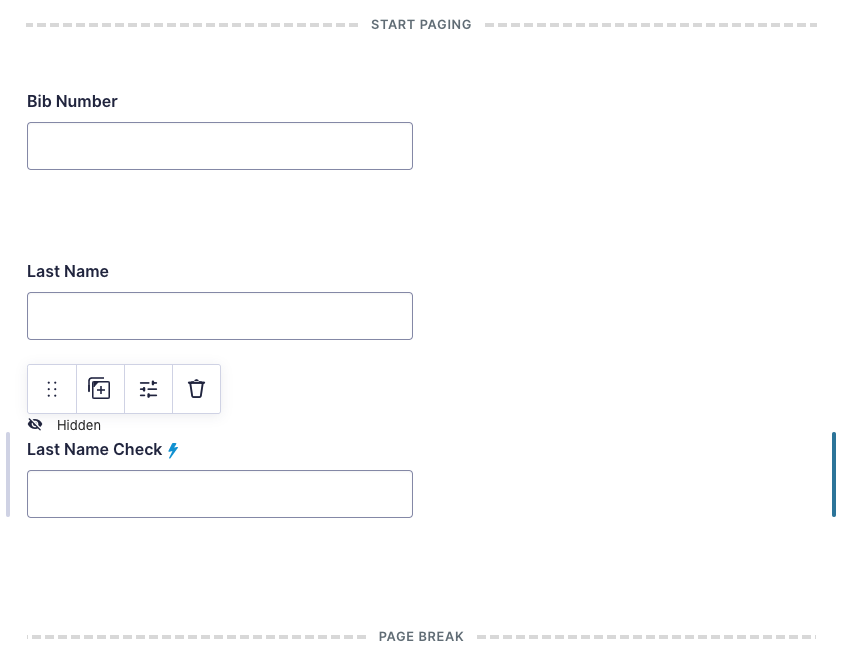
To set this up, start by adding pages to the form, then add the following Single Line Text fields to the first page:
- Bib Number
- Last Name
- Last Name Check
It should look like this:
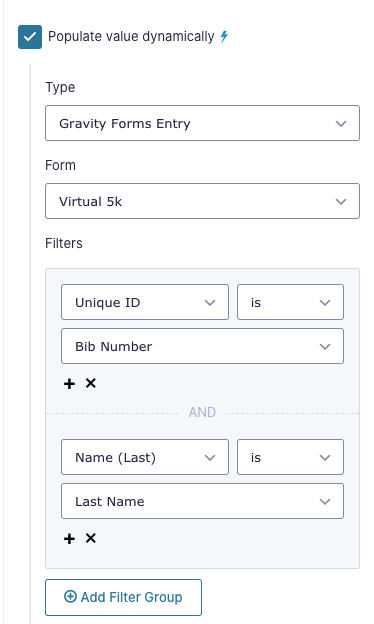
To get the lightning bolt after Last Name Check, you’ll need to set up the Gravity Perk, Populate Anything from Gravity Wiz. Start by installing and activating the perk. Then in the Last Name Check field, check the box next to Populate value dynamically on the General tab. Then make the following selections:
- Type: Gravity Forms Entry
- Form: Virtual 5k Registration (or whatever you named your registration form)
- Filters
- Unique ID is Bib Number
- Name (Last) is Last Name
It should look like this:
Scroll down to value templates, click the Property dropdown box and select Custom Value. A blank box will appear where the dropdown was. In this box enter 1. This causes the form to display a 1 if the Unique ID and Last Name match a record from the registration form. Here is what that section looks like:

On the Advanced tab, set this field to hidden so it operates behind the scenes:
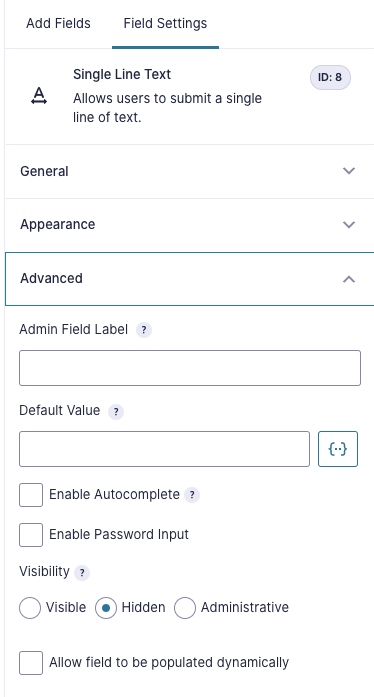
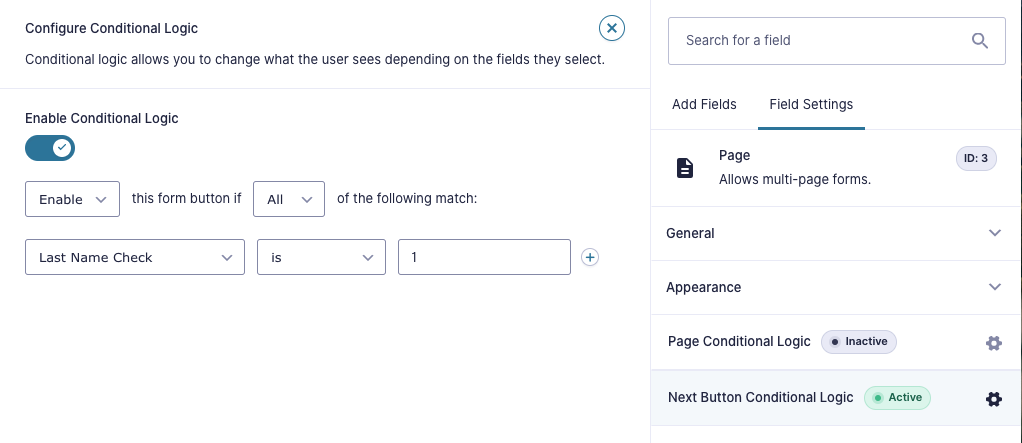
Now you’ll need to apply conditional logic to the Next button so that it only appears when the values entered match a record from the registration form. Click on the Page Break field after the Last Name Check field. Click the Next Button Conditional Logic box to open up an expanded settings screen. Check the box next to Enable Next Button Conditional Logic. Then set the Next Button to Show if Last Name Check is 1, like this:
On page two, create the fields you’ll need to collect the results.
Here are the fields you may want to include in your form:
- Name
- Birth Date
- Date of Race*
- Age on Date of Race*
- Gender
- Time**
- Photo (to upload screenshot or photo of race results from phone or watch app)
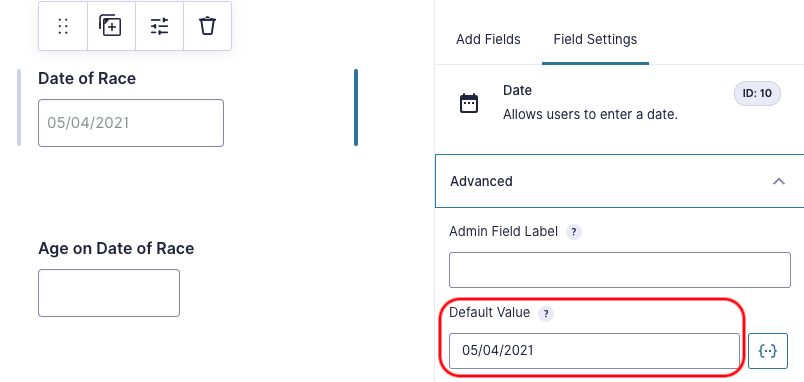
*To calculate the runner’s age on the date of the race, create a date field with the date of the race set as the default value.
Next, create a number field that subtracts the runner’s birthdate from the date of the race. Enable calculation and enter a formula using the merge tags for your form such as {Date of Race:10} – {Date of Birth:2}.
It should look like this:
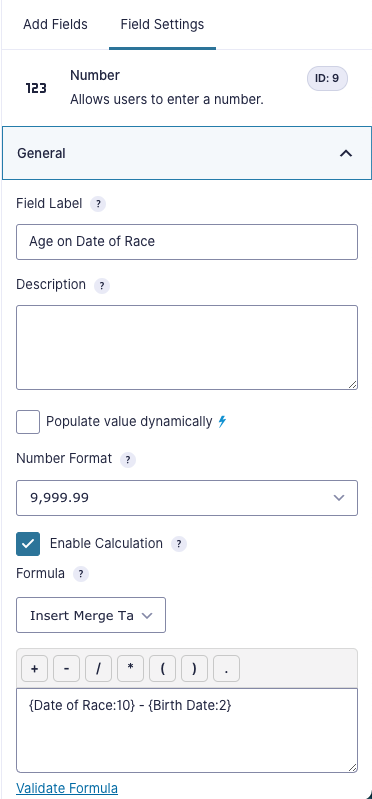
Be sure to set the calculation unit to years. This will produce a lengthy decimal after the number of years, but we will clean it up before it is displayed on the results page.
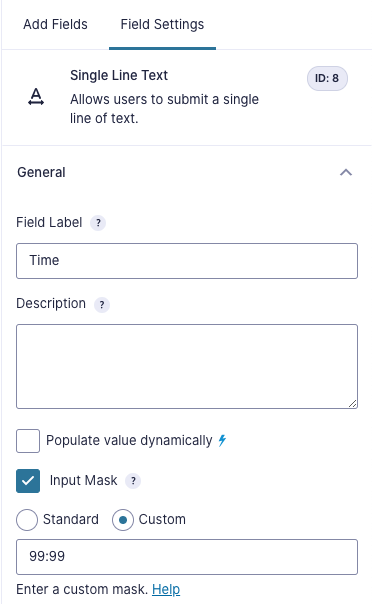
**The time field type in Gravity Forms is meant for a time of day and forces a choice between AM and PM, so it does not work for recording the duration of the run. The standard number field in Gravity Forms does not accept a time format so that field type won’t work either. Instead, use a single line text field and create a custom input mask that forces a time format by requiring two numbers, followed by a colon, followed by two more numbers. The characters for that are 99:99 as shown below.
**The time field type in Gravity Forms is meant for a time of day and forces a choice between AM and PM, so it does not work for recording the duration of the run. The standard number field in Gravity Forms does not accept a time format so that field type won’t work either. Instead, use a single line text field and use an input mask that forces a time format.
If you have Math by GravityView installed, you’ll see a standard input mask for Duration (MM:SS) or Duration (HH:MM:SS).
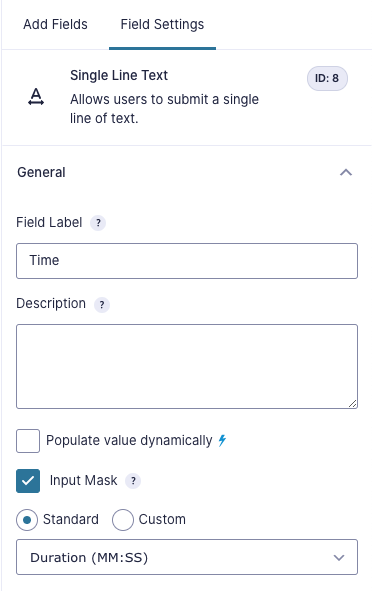
Choose the appropriate one and proceed.
Without Math by GravityView, you can create a custom input mask requiring two numbers, followed by a colon, followed by two more numbers. The characters for that are 99:99 as shown below.
Since the first page confirms who is filling out the results form, you can auto populate the Name, Birth Date and Gender fields using the information you collected in the registration form. You’ll use Populate Anything to do this also.
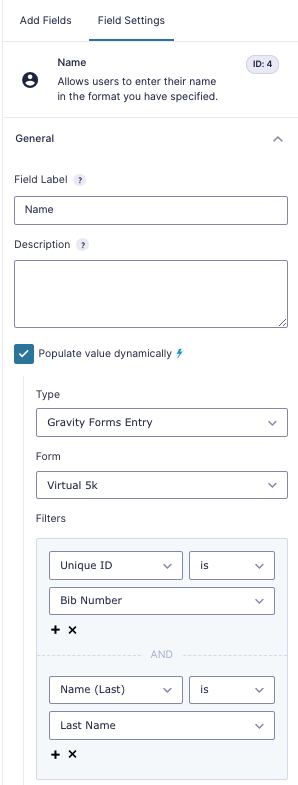
First, for the Name field, check the box next to Populate value dynamically on the General tab. Then make the following selections:
- Type: Gravity Forms Entry
- Form: Virtual 5k Registration (or whatever you named your registration form)
- Filters
- Unique ID is Bib Number
- Name (Last) is Last Name
It should look like this:
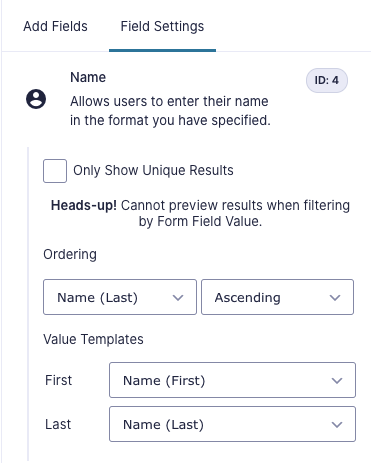
Now set your Value Templates to match up, selecting your first and last name fields from the drop down:
Next, do the same thing for the Birth Date and Gender fields, using all the same values in the first section and setting the Value Template to your Birth Date and Gender fields, respectively.
Now the name, date, and gender fields will pre-populate from the information submitted with the registration form and runners can enter their time and upload their image to complete their results entry.
Note, in this form I am using a Single Line Text field for gender. However, since it is pulling in the information from the registration form entry, it will only populate with the choices you offered there, so no need to worry about misspellings, abbreviations, etc. skewing your results.
Prevent Changes in Information
To avoid the runner changing this information, you may want to set the field to hidden on the Advanced tab, or make it read only with Gravity Perks’ Read Only plugin.