Control Image Sizes Automatically
Back to: Exploring the Image Hopper Plugin
In this lesson you will learn how Image Hopper can be used to automatically control image sizes before uploading them to your form. This is a very useful feature so that you can:
- Ensure images are all the same size so they display consistently when viewed eg. when using GravityView
- Keep your bandwidth and storage costs lower than uploading and saving the full size images. It’s got the added benefit of faster uploads because images are resized in the browser and not on the server.
- Generating documents using Gravity PDF which don’t do well when trying to display more than 10MB worth of images.
In the Form Editor, select the Image Hopper field you added in the previous lesson. Now let’s take a look at the settings needed to control the image sizes:
General Tab
Downscale Images
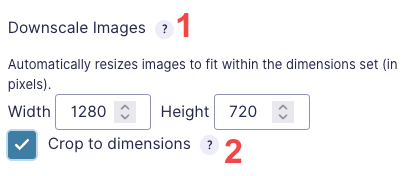
Image Hopper can automatically resize images to fit within the specific dimensions you’ve set, while respecting the aspect ratio. To do this, set the width and height (in pixels), and images will automatically be resized (but not cropped) to these values.
As an example, if a user uploads an image that is 1500x1500px, and you’ve told Image Hopper to downscale to 1280x720px, the saved image will be 720x 720px.
Crop to dimensions
Enable Crop to dimensions if you want to automatically resize and crop images to the exact size you’ve set in the Downscale Images setting.
NOTICE
If an uploaded image is smaller than the specified size, it will not be scaled up. However, it is possible to set a minimum image size or display a warning to users that their image is too small. Alternatively, you can use the Upscale to Crop Dimensions setting.
Output Quality
Image Hopper’s Output Quality settings can be hugely beneficial to businesses that demand high quality images to be submitted (such as photography, printing, etc).
You can set the Output Quality of JPG/JPEG images to a value between 0 (worst) to 100 (best). Aside from the image quality, the value used in this setting will also affect the file size of the uploaded image. Here’s an example:
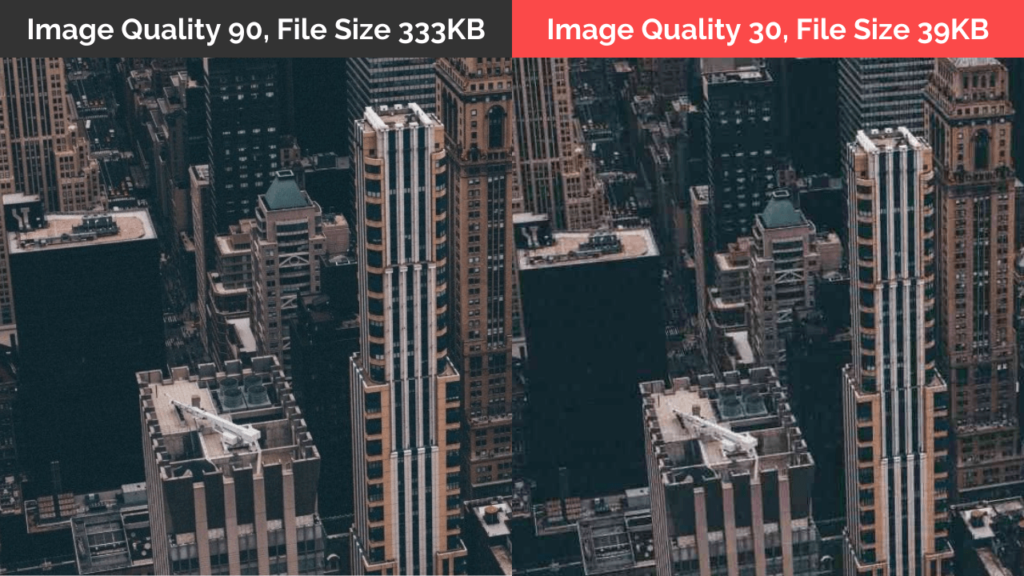
Uploading images in lower quality (right image) have more visible pixels compared to a higher quality one (left image). The lower the quality of the image is, the smaller the file size.
Advanced Tab
Enable Minimum Image Size
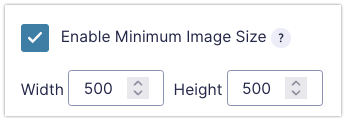
The Enable Minimum Image Size setting will prevent users from uploading any images smaller than the size you have specified. This is useful if you need to print digital photos because it forces your users to submit images in a higher resolution.
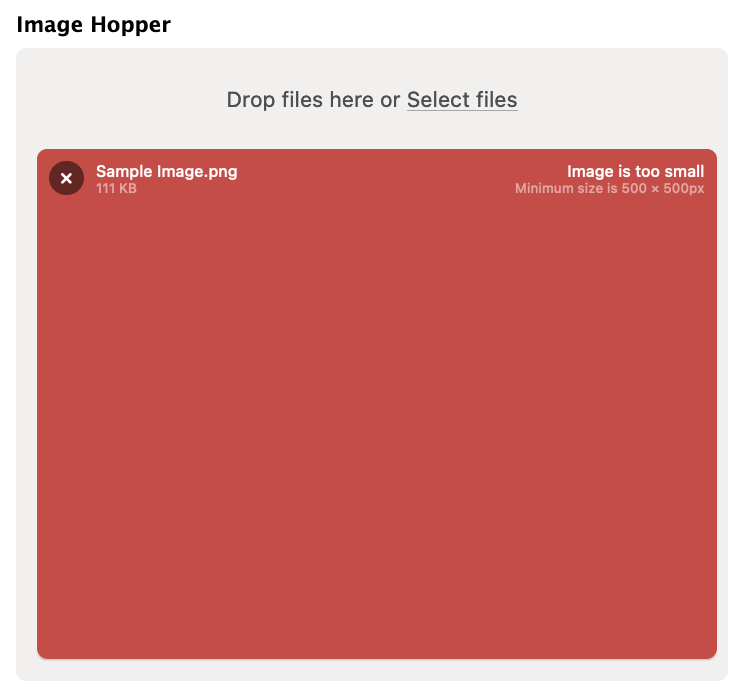
Enable this so you can indicate the minimum width and height requirement (in pixels) in the provided fields.
Enable Minimum Image Size Warning
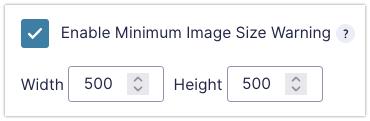
Unlike the Minimum Image Size setting, when you enable the Minimum Image Size Warning, it won’t prevent any images being uploaded. Instead it displays a message below the Image Hopper field warning a user that the image is a lower quality than you have set.
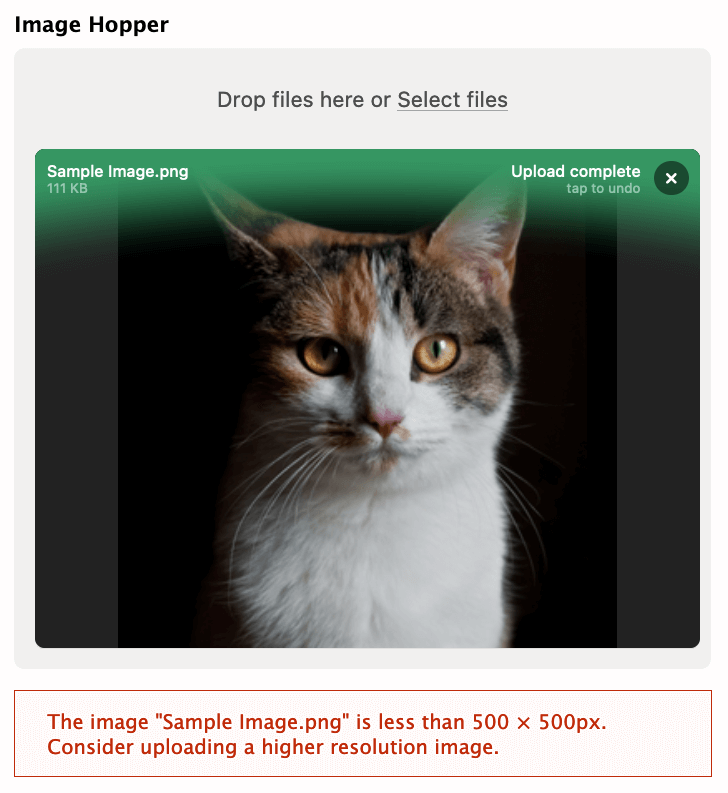
You can combine the Minimum Image Size and Minimum Image Size Warning settings together with different sizes.
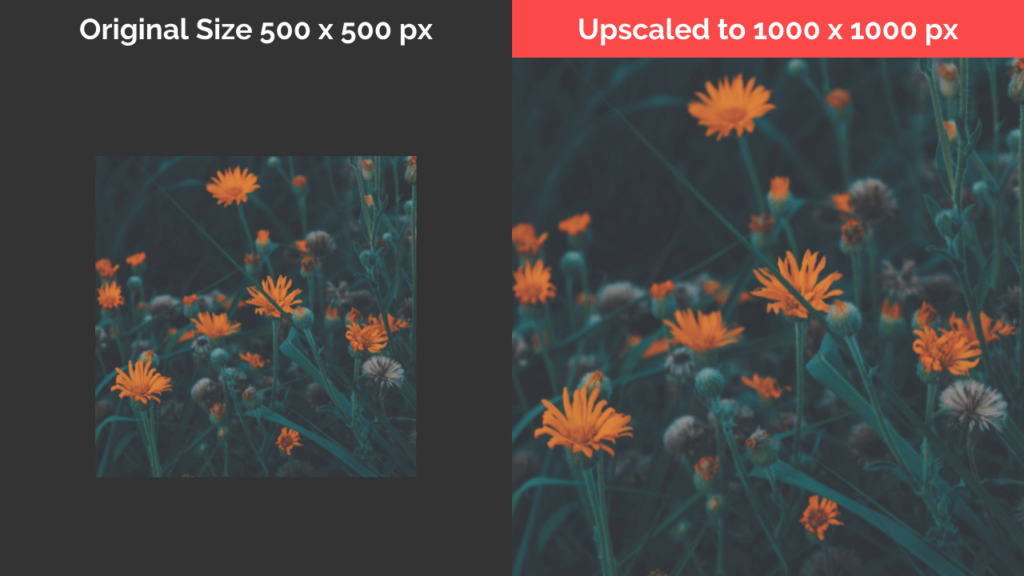
Upscale to crop dimensions

This setting will only be available if Crop to Dimensions is enabled. Turning this on will allow Image Hopper to automatically upscale images to fit the size you’ve set in Downscale Images. Upscaling does negatively affect the image quality. See examples below: